Monday, February 20, 2017

Shooting Waterfalls

If there is one thing you will find in abundance in the Pacific Northwest are waterfalls.  Here are a couple of tips for when you wan to shoot waterfalls.

1.  What do I need?

The only equipment you need for shooting waterfalls is a camera and a tripod.  Some optional equipment that would be great to have but not required are a polarizer filter and a cable release.  The camera is self-explanatory, the tripod is to have a stable platform for long exposures.  A polarizer will reduce glare of the water and a cable release will help with camera shake because you are not touching the camera when you expose the image.

2.  How long do I exposure for?

This answer is as varied as is people's taste. I break the waterfall into two categories, one where you wan to show the power of the gushing water and have more detail in the water.  The second is where the silky smooth effect shows the grace and beauty of the falls.
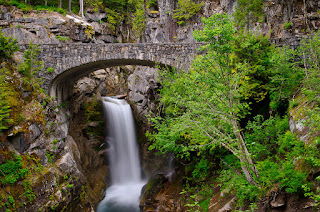
I set my camera to manual and change the ISO to 100.  My aperture is set to achieve maximum focus, usually f/8 to f/11.  For big falls I try to achieve a shutter speed below 1 second, anything between 1/4 and 1 second.  This will still show the motion in the water and still retain detail in that movement.

To achieve a longer shutter speed I adjust to a smaller aperture, even f/22.  With this I can achieve a shutter speed of 1-4 seconds, this will achieve the silky smooth water effect.

3.  Wide Angle or Zoom Lenses?
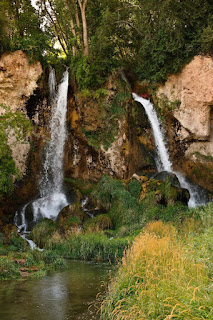
Take both wide-angle and zoom lenses to photograph waterfalls.  High and powerful waterfalls can release large amount of water into the air, getting you or your camera wet or damaged.  Use a telephoto lens such as 70-200mm to photograph falls from a distance and a wide-angle lens such as 16-35mm if the falls are smaller and you are standing close to them.

4. When to go?

Depending on the water source of the waterfall, it may look drastically different throughout the seasons.  If the waterfall is fed by snowmelt it might be dried up by the end of summer.  Late spring or early summer are usually the best time to visit them.

Lighting  conditions also affect when you should try to shot waterfalls.  Balanced and diffused light is great for waterfalls because it helps bring out details in the shadows and amplify the contrast.  The best diffused light occurs on overcast days, but if not then try visiting during sunrise or sunset.  Try to avoid when half of the waterfall is in the shade and half is sunlit.


Saturday, February 4, 2017

Touching up Portraits

Here is a little tip for touching up portraits in Photoshop called Frequency Separation.  Frequency separation works because it allows you to separate the texture of an image from the color and the tone.  When retouching you can focus on just the texture or the skin just beneath it.

Before
After

Step 1.   Creating Copies

In Photoshop, create two copies from the base image.  Name the first copy "Low Freq Blur" and the second copy "High Freq Texture".  Toggle the "High Freq Texture" layer visibility to off.  Group the two layers into a folder and rename it Frequency Separation.

Creating copies

Step 2.   Adding Gaussian Blur

Select the "Low Freq Blur" layer.  Then go to to Filter, Blur and select Gaussian Blur.  Add enough blur to the image that the texture disappears but not enough that everything blends together.  The amount depends on the photo but 4 to 8 is a good estimate.

Step 3.  Apply the Image

For the next step, toggle "High Freq Separation" layer to on.  Then select the High layer and go to Image and then Apply Image.In the layer selection choose the "Low" layer.  For the blending selection choose Subtract.  Add the value 2 for Scale and 128 for Offset.

Once you select the values, the image will turn gray with some faint details.  The faint details are the details blurred out from the "Low" layer.  Change the layer blending mode to Linear Light to finish the step.

Applying the image

Step 4. Remove Blotches

The next step is to remove the uneven colors of the skin.  Select the "Low" layer.  Use the lasso tool and select an area of uneven skin tone.  Change the feather to around 30px to make the transition smoother.  Once you made the selection, add more Gaussian Blur to it.  Set the blur radius to a point to where the skin tone blends well.  Repeat this for all areas where you think there is uneven skin tone.

You can also clone out areas where there are different colors on the skin, such as pimples or a dark scar.  Once you cloned it out, select the general area of the imperfection and then apply Gaussian blur to even it out.  In this step of Frequency Separation you are only dealing with the skin color or tone and not the details.


Step 5.  Edit Textures

For step 5, select "High" layer.  Select the Cloning Tool and change the Sample Layer to Current Layer.  Clone out the imperfections such as scars and pimple.  When you clone out things on this layer you are only cloning out the texture and not the color, so you can sample from an area with different color and apply it to another.

The last thing you will want to do is adjust the opacity of the group.  You can apply as much or as little of this effect to your overall image.  Set the opacity to what you think works well.  That is Frequency Separation.